Stop Damp for Good - Proven Wall Treatment Specialists in Sandton and Bryanston

Two Decades of Damp Proofing Expertise — Your Walls Guaranteed for 10 Years

Roof leaks can cause Rising damp in walls

Leaks occur when the roof leaks into the centre cavity of the exterior house walls.
There is a 10 millimetre gap between these bricks in which the water falls down until it reaches the damp-proof course (DPC).
At this point, the water saturates at the bottom of the wall or at the first-floor slab, and damp is seen at the bottom on the inside of the house. Oddly, it’s seldom seen at the top of the wall where it enters.
This indicates a roof leak, not rising damp.

Higher ground level outside
Other leaks include a higher ground level on the exterior of the house, where this is illegal.
The law allows for the ground floor level to be higher than the garden level.
When the paving or the garden level outside is higher than the ground floor level, water enters on top of the damp-proof course (DPC) and gets channelled inside.


 Call Paul: 0823139217

Need Help? WhatsApp Me!
Cresta Help Chat
Send via WhatsApp
Get a FREE Quote for Damp Proofing

For a faster response WhatsApp the word "Quote"
and Paul will contact you!

Thank you for your time

Damp-Proof Course (DPC)

Definition and construction

  • Let’s define the damp-proof course (DPC).
  • In the construction of a house, to keep it simple, we start with the foundation. The foundation goes in and is laid with concrete.
  • Once this is cured, the developer then builds plinth walls.
  • Plinth walls rise from the foundations until ground floor level, at which stage the sand from the foundations is backfilled against the plinth walls and levelled and compacted. Thus, plinth walls are sub-soil, and this is the area we damp proof.
  • There is a lot more that goes into it, but for the simplicity of this explanation, a DPC plastic sheet, typically a minimum of 350 micron, is laid on top of the compacted backfill.
  • A concrete slab is then thrown, and the damp-proof course extends through the exterior house wall, on which the wall continues to be built on top of the concrete and on top of the damp-proof course, using the outer skin of the house as the continuous course.

Leak effects inside

  • When a leak occurs inside the house (like from a bathroom, plumbing, etc.), water enters on top of this plastic which spans through the entire house.
  • It can then gravitate and wick through the porosity of the concrete or screed or flooring material, which is sometimes porous like wooden decking material, and be delivered deep within the house.
  • This wooden flooring material rots and causes mould, and this is where damp through mould occurs.

Mould hazard

  • Mould is a health hazard.
  • It should be cleaned with white vinegar, not bleach, as bleach will propagate the mould.
  • Skirtings are another area where mould is visible. Once the skirting has swollen, we notice dimples from the nails which have remained at the original height of inception, and the skirting has swollen around the nail, creating dimples.
  • Once the skirting is removed, black mould can be seen on the back.

Black Mould

  • Black mould is created in the presence of moisture, food, and oxygen. Once one of them is removed, the mould will cease to exist.
  • The reason mould is so bad for us is because it propagates in the bronchial system, much like the seeds of a mushroom spore entering the atmosphere which, once ingested, germinate in the ENT system of our bodies (ear, nose, and throat).
  • Once this germinates, flu-like symptoms are experienced.
  • After my 25 years of experience, the worst cases I find are noses that stream with blood, especially in younger children.
  • Multiple doctor visits don’t treat the cause; they alleviate the symptoms.
  • Wooden flooring and wooden skirtings are very sensitive to mould growth.
  • We also notice mould growth on carpets and parquet flooring.
  • We always advise tiling the inside of the house for a mould-free environment.
  • We have processes to waterproof the floor slab and walls so that you can enjoy wood finishes.

Water Ingress from Plinth Walls (Design Construction Fault)

  • Water ingress from damp through the plinth walls, which is a design construction fault.

Old industry standard

  • Our industry standard many years ago was to have these plinth walls built as face brick.
  • This allows the water trapped under the damp-proof course plastic to evaporate through osmosis due to the pull of the sun / atmospheric relative humidity.
  • The water trapped under the damp-proof course needs a way to exit.
  • This is where we use damp proofing and air bricks punched through the plinth walls.

Air bricks have different prices:

  • If you go surface-mounted
  • If you enter through one brick
  • Or if you core drill through two bricks into the sub-soil backfill

  • This then allows the wall to breathe through the backfill.

  • Multiple air bricks placed in close proximity allow air to move inside the building and create a path of least resistance for the water to be scavenged.
  • Air bricks placed one inside and one outside will remove water as the air passes through the wall thickness

Industry shift

  • The industry standard was face brick, and you notice this on the old builds of 30–50-year-old houses (as dated in 2024).
  • The industry trend now is to plaster these plinth walls.
  • In the old style of building, we would have face brick at the bottom and plaster above.
  • By extending the plaster to the floor without damp-proof precautions, damp pushes its way through the new plaster

How Water Decomposes Plaster

Historical context

  • In the old days, we did not have cement.
  • We went into caves, chopped out stalagmites and stalactites, powdered them, and added them to sand.

Erosion process

  • As water moves, it erodes.
  • The heavier the water flow, the greater the erosion.
  • As water moves through the building, it leaches lime and deposits it on the surface after evaporation.

Effect on plaster

  • Sand particles are released once lime is removed.
  • As the sand is released, anything adhered to it comes loose.
  • That is why when damp bubbles are popped, sand runs out.

Correct solution

  • The only long-term solution is to stick new plaster to a solid surface — the brick.

Bricks and Hardness

Brick properties

  • Bricks change form from their original composition.
  • Clay bricks are endothermic.
  • Cement stock bricks change form chemically.
  • These bricks cannot decompose as quickly as mortar or plaster.

Hardnesses (MPa)

  • Mortar: ~4 MPa
  • Plaster: ~4 MPa
  • Cement stock bricks: 7–12 MPa
  • Clay bricks: variable

Implication

  • Bricks don’t decompose as plaster or mortar do.
  • Sticking damp-proof systems to brick is the only long-term solution.

Expansion and Movement

  • Different materials expand and contract at different rates.
  • This movement causes cracks and gaps where water enters.
  • Damp-proofing prevents water ingress and preserves the structure.

Subsoil damp proofing

  • This is the area we specialize in
  • Good examples can be seen on our YouTube videos
  • Prime examples are underground cellars
  • Repairs require treating the floor, walls, and ceiling

Conclusion

  • Our damp-proof systems are designed using material limits to produce strong, affordable solutions.
  • Kindly contact us for a free assessment to rejuvenate your home for long-lasting effects.

Treating Damp Walls – No More Damp Walls

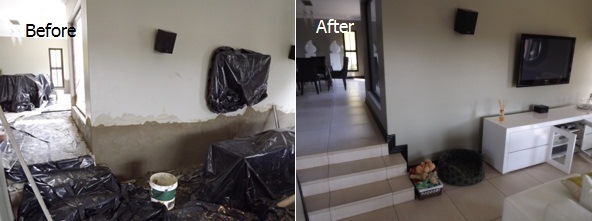
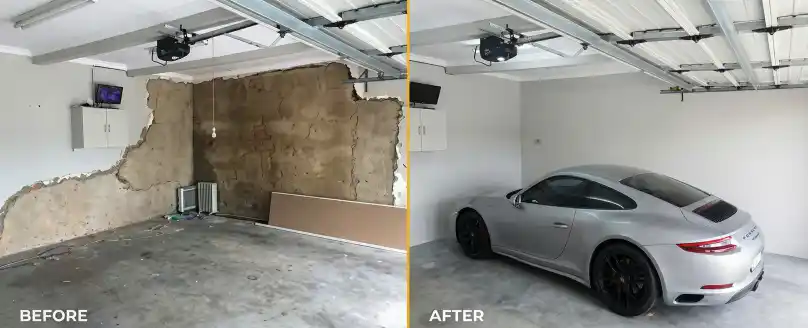
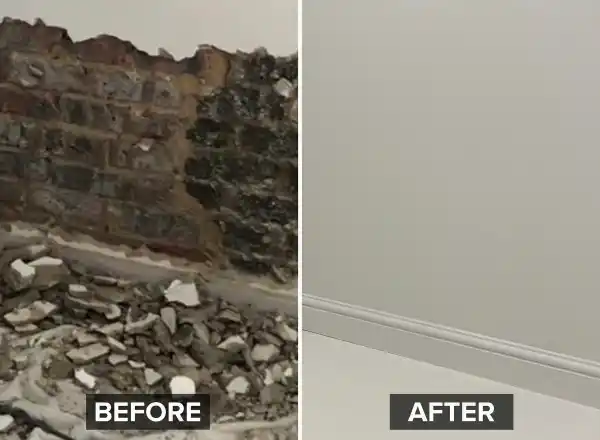
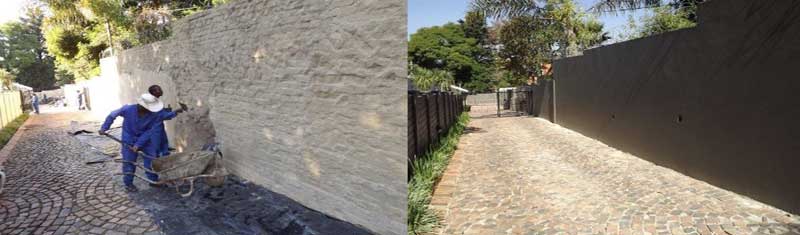
Before and after damp repair

Before and after damp proofing wall treatment

How to repair damp internal walls:

Identify the source of the damp – Check for roof leaks, plumbing leaks, high exterior ground levels, or water ingress from planter boxes and ponds. Only by fixing the source can internal damp be properly repaired.
Remove and replace damaged plaster – Old or decomposed plaster should be removed and replaced with new plaster applied directly to solid brick surfaces. Avoid applying damp-proof systems on failing plaster.

ReHow to repair the Damp damaged inside wall areas?

Here's What I'll Do to Fix Your Damp Wall

1. Stop the water ingress.
We fix nothing until we've stopped the source. Every other step depends on this one.
2. Strip the rotten, bubbling plaster back to brick.
That damaged plaster has to go. Once water leaches the lime, the sand releases and there's nothing left to hold it. We expose the brick — because that's the only solid surface worth building on.
3. Waterproof the brick with our Cement–Latex–Mix.
This is our own house brand, fine-tuned over 20 years and registered since 2001. Underground walls like retaining walls and cellars get a combination of coats with cure-time in between — adjusted to your specific requirements. No two walls are the same, and we treat them accordingly.
4. Re-plaster to match.
We re-plaster to match your existing texture or apply a Rhino-lite finish. The repair is flawless and invisible — tailored to what your wall needs.
5. Undercoats and paint to match the surrounding walls.
We finish the job properly. When we're done, you shouldn't be able to tell we were ever there — except that the damp is gone.

Repairing Damp-Damaged Inside Walls

How do we repair the damp-damaged areas on the inside of your walls? Let me walk you through it.

  1. Stop the water ingress. First things first, identify and stop the source.
  2. Remove the rotten, bubbling plaster to expose the bricks. As we know, once water leaches the lime from plaster, the sand releases and everything adhered to it comes loose. The only long-term solution is to get back to a solid surface — the brick.
  3. Waterproof the bricks with our Cement–Latex–Mix — our own house brand, fine-tuned over 20 years and registered since 2001. Underground walls like retaining walls and cellars need a combination of coats with cure-time in between, adjusted to your specific requirements.
  4. Re-plaster to match the existing texture or Rhino-lite finish — a flawless, invisible repair.
  5. Finish with undercoats and paint to match the surrounding walls. You shouldn't be able to tell the wall was ever touched.

After the damproofing treatment we replaster the wall and re-waterproof

Why Use Us? 

How We Treat Rising Damp on External and Internal Walls

Our strength lies in our proven know-how. We don't just patch over the problem; we get to the root of it. With decades of experience, we've fine-tuned our methods to ensure that when we fix a damp wall, it stays fixed. We understand the science of water ingress and have the expertise to apply the right solution for your specific situation.

We provide a comprehensive waterproofing system for your home. This isn't just about applying a coat of paint; it's about creating a durable barrier against moisture. By using our specialized Cement-Latex-Mix and other proprietary products, we ensure that your walls are completely sealed and protected from the elements, whether they are internal or external.

This complete approach is what allows us to offer a 20-year life-proof paint system. When the underlying structure is properly waterproofed and prepared, the finish coats can perform as they were designed to. You get a beautiful, long-lasting finish that won't bubble, peel, or flake, giving you peace of mind for years to come.

Peace of Mind

24 Years of Expertise in Damp Proofing. Trusted Solutions for Dry, Secure Walls.

10-Year Written Guarantee on Workmanship.
If the work is faulty, we fix it. Simple as that. A written guarantee backs every job we complete - no fine print, no excuses.

10-Year Written Manufacturer's Guarantee on Products.
We only use products we trust. Every material applied to your walls carries a 10-year manufacturer's guarantee, because a system is only as strong as what it's built with.

My Personal On-Site Supervision and Inspection

I'm not a call centre. I show up. Every job receives my personal supervision and inspection, because after 24 years, I know that the difference between a good job and a great one comes down to the details on the day.

I don't send a crew and disappear. I've built this business on reputation, not volume, and that means your home gets treated like my own. When I sign off on a job, I sign off on it personally. That's not a slogan. That's 24 years of showing up and getting it right.

Damp Walls: Identify, Prevent, and Fix Walls

1. Know What You're Looking At:
Damp falls into two categories, leaks and design faults. Identifying the cause is the first and most critical step.
2. Understand What Water Does:
Water leaches the lime from plaster, the sand releases, and everything comes loose. Left untreated, it creates mould, a serious health hazard.
3. Fix It Properly - Get Back to the Brick:.
Remove the damaged plaster, waterproof the brick, re-plaster on a solid sealed surface. Anything else is temporary.
Damp Proofing Walls | 24 Years Experience | Paul Usswald crossmenu